
With every advancement of technology, things just keep getting better for us.
One such example is note-taking. Even though it’s hard to replace the old-school feeling of actually writing on paper, digital note-taking has some really cool benefits that are hard to ignore. Many people are moving to digital note-taking, and I am not surprised.
A digital notebook can be more practical than writing on paper because all your notes can be stored and accessed anywhere. Also, you don’t have to worry about carrying physical copies of your notebooks.
One of the best apps that are out there for this purpose is Microsoft OneNote. It’s more than just a note-taking app, allowing you to achieve much more.
This post will discuss this app and how to use it on iPad and Windows.
What is Microsoft OneNote?
To explain in the simplest manner, Microsoft OneNote is a solution that could replace your physical notebook. It allows you to take notes, be more organized and increase your productivity massively.
It’s suitable for both personal and business users because the app can handle many robust tasks as well, and you can collaborate with team members to achieve more in less time.
While I cannot predict the future, I see a high chance of you shifting to digital note-taking once you use this app.
Also read: Increase Teams Creativity with These Brainstorming Tools
Why Should You Use Microsoft OneNote?

If I wanted, I’d create an endless list of reasons why you should use this solution, but since I don’t want to overwhelm you, let me tell you a few of the many reasons why OneNote can become your best friend.
#1. Project Management
Whether you’re a student or a working professional, projects are essential to your daily routines. With OneNote, you can easily manage your projects, create presentations, deliver instructions, and deliver your ideas in the most seamless manner.
#2. Make To-do Lists
One of the many things that I love about OneNote is that it allows you to create from scratch or use ready-made templates to save time. Depending upon your time constraints, you can do either of those to create your to-do lists and smash them on time.
#3. Real-Time Collaboration

Bring your team together in a single place, share ideas, deliver instructions, and basically keep everyone on the same page with the help of real-time collaboration. You can share media and notes as well as give access to your notebook to anybody you wish to.
#4. Quick Notes
We all want to take notes to keep ourselves accountable. With OneNote, you can easily write down notes any time of the day and come back to them when you need them. Think of quick notes as little sticky notes when you immediately want to write something down.
#5. Class Notebook for Students
This solution has always been a favorite choice for students, so if you’re one, you can use it during your university/school hours and never lag behind the knowledge being provided to you.
It has a separate feature called Class Notebook, where students can organize and learn course content effectively, and teachers can deliver the lessons easily.
There’s a dedicated workplace for students and teachers to get work done without distraction.
#6. Organized

Being organized is an essential element of note-taking, and it’s safe to say that when things are digital, organizing becomes much easier. You can easily store, sort and access your information with OneNote without feeling overwhelmed.
#7. Multi-Device Syncing
With multi-device syncing, you can switch your device anytime and continue exactly where you left off. This is very useful for people who like to access the app from their computer as well as from their mobile.
#8. Sketching, Drawing, and Handwriting
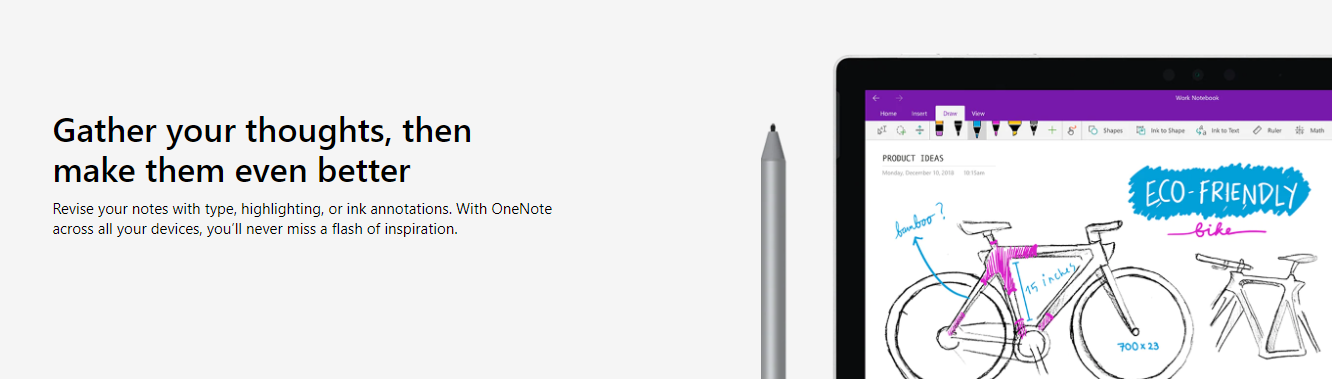
Never feel like missing out on writing on paper because OneNote allows you to sketch, scribble, draw and handwrite on the canvas. You can integrate it with the Apple Pencil and begin note-taking just like how you’d do it on paper.
How to Use Microsoft OneNote on Windows & Mac
Beginning with our computers, using OneNote on them is like a treat. You have a bigger screen to work with and visualize your ideas. Here’s how you can use the app on your Windows and Mac computer:
#1. Creating a Notebook
When you open OneNote on your computer, you’ll already have a notebook created automatically. However, you can create new ones easily as well if and when you need them.
Go to File > New and select one of the options on the left.

For this example, I’ll click on the This PC tab. Go ahead and type the name of your new notebook.

You’ll see your new notebook open immediately.
#2. Opening a Notebook
If you want to open an existing notebook and work on that, you can do that by going to File > Open and selecting the notebook you wish to open.
#3. Writing Notes
Probably the most exciting part, writing notes, is the first step to penning down your thoughts, plan, or schedule.
Once your notebook is opened, you can start writing, format it as you like, and utilize sections to divide the note into multiple pieces to keep things organized.
Moreover, you can:
- Insert media
- Change fonts
- Change text color
- Create shapes
- Draw elements
You can do anything you’d want on paper, except it allows you to do MORE.
#4. Creating a Quick Note
Quick Notes are super useful because they allow you to store your notes like sticky notes. You can create them by clicking on View and then clicking on the 3 dots at the far right.

Click on New Quick Note.

Now you can write your little sticky note that can be accessed anytime.
#5. Syncing Across Devices
You can sync your notebooks across devices by going to File > Info and clicking View Sync Status.

You can choose whether you want your data to sync as soon as you make any changes or if you want to do it manually.
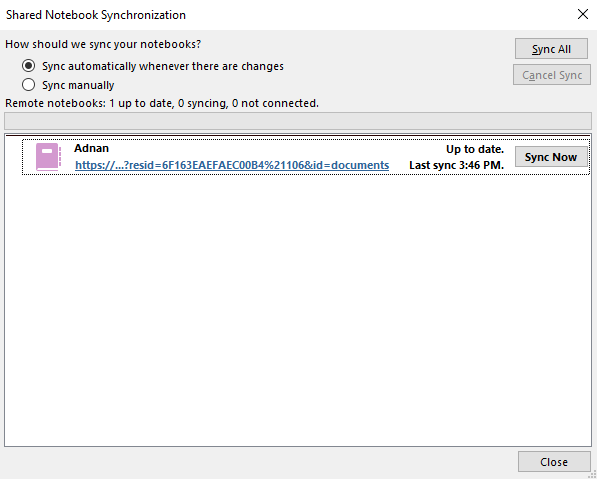
Since I like the automatic option, I’ll keep it like that.
How to Use Microsoft OneNote on iPad
Using it on an iPad is as easy as on a computer, but you benefit from much more portability. Here are the steps for it.
#1. Creating a Notebook
Once the app opens, you can create a new notebook by tapping on this arrow on the left.
![]()
On the bottom left, you’ll see + Notebook. Tap on that.
![]()
Now, you can enter the notebook’s name, choose a color, and the location where you want the notebook to be saved.

Once you’ve selected your preferences, tap on Create to be done with it.
#2. Opening a Notebook
To open an existing notebook, you can go to your notebooks list and access them from there.
If you wish to open additional notebooks on the same account, tap More Notebooks at the bottom of your notebooks list.
#3. Writing Notes
Writing your notes is a very smooth experience, and you can utilize a bunch of formatting tools, as well as organization options, such as Sections.
Changing color, applying a new font, and adding media are also a breeze.
#4. Creating a Sticky Note
To create a Sticky Note on your iPad, tap the highlighted icon under Home.
![]()
Once the dialog opens, write your sticky note to access them anytime.
#5. Syncing Across Devices
By default, all of your progress on iPad will be synced across different devices to ensure you can continue your work as soon as you switch devices, irrespective of whether it’s a PC or a mobile.
Final Words
If you want things to be fast, convenient, and less time-consuming, then going digital is the answer. When you opt for digital note-taking, you open yourself to more productivity and basically a better workflow.
Microsoft OneNote is one such app that allows you to achieve that easily.
Next, learn how to visualize your idea with these mind map makers.