
Python is a very versatile language, and Python developers often have to work with a variety of files and get information stored in them for processing. One popular file format you’re bound to encounter as a Python developer is the Portable Document Format popularly known as PDF
PDF files can contain text, images, and links. When processing data in a Python program, you might find yourself needing to extract the data stored in a PDF document. Unlike data structures such as tuples, lists, and dictionaries, getting information stored in a PDF document might seem like a difficult thing to do.
Luckily, there are a number of libraries that make it easy to work with PDFs and extract the data stored in PDF files. To learn about these different libraries, let us look at how you can extract texts, links, and images from PDF files. To follow along, download the following PDF file and save it in the same directory as your Python program file.
To extract text from PDF files using Python, we are going to use the PyPDF2 library. PyPDF2 is a free and open-source Python library that can be used to merge, crop, and transform the pages of PDF files. It can add custom data, viewing options, and passwords to PDF files. Importantly, though, PyPDF2 can retrieve text from PDF files.
To use PyPDF2 to extract text from PDF files, install it using pip, which is a package installer for Python. pip allows you to install different Python packages on your machine:
1. Check if you already have pip installed by running:
pip --versionIf you don’t get back a version number, it means pip is not installed.
2. To install pip, click on get pip to download its installation script.
The link opens a page with the script to install pip as shown below:

Right-click on the page and click on Save as to save the file. By default, the name of the file is get-pip.py
Open the terminal and navigate to the directory with the get-pip.py file you just downloaded then run the command:
sudo python3 get-pip.pyThis should install pip as shown below:

3. Check that pip was successfully installed by running:
pip --versionIf successful, you should get a version number:

With pip installed, we can now start working with PyPDF2.
1. Install PyPDF2 by executing the following command in the terminal:
pip install PyPDF2
2. Create a Python file and import PdfReader from PyPDF2 using the following line:
from PyPDF2 import PdfReaderThe PyPDF2 library provides a variety of classes for working with PDF files. One such class is the PdfReader, which can be used to open PDF Files, read the contents, and extract text from PDF files, among other things.
3. To start working with a PDF file you first need to open the file. To do this, create an instance of the PdfReader class and pass in the PDF file you want to work with:
reader = PdfReader('games.pdf')The line above instantiates PdfReader and prepares it to access the contents of the PDF file you specify. The instance is stored in a variable called reader, which will have to access a variety of methods and properties available in the PdfReader class.
4. To see if everything is working fine, print out the number of pages in the PDF you passed in using the following code:
print(len(reader.pages))Output:
5
5. Since our PDF file has 5 pages, we can access each page available in the PDF. However, counting starts from 0, just like Python’s indexing convention. Therefore, the first page in the pdf file will be page number 0. To retrieve the first page of the PDF, add the following line to your code:
page1 = reader.pages[0]The line above retrieves the first page in the PDF file, and stores it in a variable named page1.
6. To extract the text on the first page of the PDF file, add the following line:
textPage1 = page1.extract_text()This extracts the text on the first page of the PDF and stores the content in a variable named textPage1. You thus have access to the text on the first page of the PDF file through the variable textPage1.
7. To confirm the text was extracted successfully, you can print the contents of the variable textPage1. Our entire code, which also prints the text on the first page of the PDF file, is shown below:
# import the PdfReader class from PyPDF2
from PyPDF2 import PdfReader

# create an instance of the PdfReader class
reader = PdfReader('games.pdf')

# get the number of pages available in the pdf file
print(len(reader.pages))

# access the first page in the pdf
page1 = reader.pages[0]

# extract the text in page 1 of the pdf file
textPage1 = page1.extract_text()

# print out the extracted text
print(textPage1)
Output:

To extract links from PDF files, we are going to PyMuPDF which is a Python library for extracting, analyzing, converting, and manipulating the data stored in documents such as PDFs. To use PyMuPDF, you should have Python 3.8 or later. To get started:
1. Install PyMuPDF by executing the following line in the terminal:
pip install PyMuPDF2. Import PyMuPDF into your Python file using the following statement:
import fitz3. To access the PDF you want to extract links from, you first need to open it. To open it, enter the following line:
doc = fitz.open("games.pdf")4. Having opened the PDF file, print the number of pages in the PDF using the following line:
print(doc.page_count)Output:
5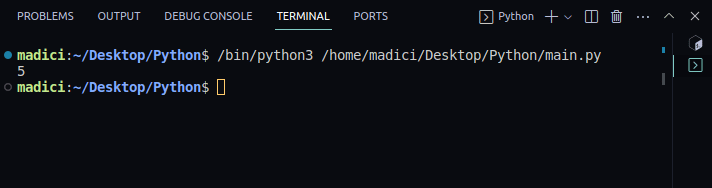
4. To extract links from a page in the PDF file, we need to load the page we want to extract links from. To load a page, enter the following line, where you pass in the page number you want to load into a function called load_page()
page = doc.load_page(0)To extract links from the first page, we pass in 0(zero). The counting of pages starts from zero just like in data structures like arrays and dictionaries.
5. Extract the links from the page using the following line:
links = page.get_links()All the links in the page you specified, in our case, page 1, will be extracted and stored in the variable called links
6. To see the content of the links variable, print it out like so:
print(links)Output:
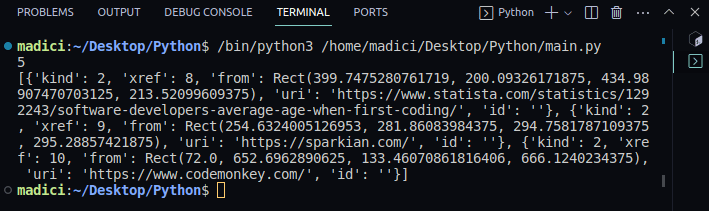
From the printed output, notice that the variable links contain a list of dictionaries with key-value pairs. Each link on the page is represented by a dictionary, with the actual link stored under the key “uri“
7. To get the links from the list of objects stored under the variable name links, iterate through the list using a for in statement and print out the specific links stored under the key uri. The entire code that does this is shown below:
import fitz

# Open the PDF file
doc = fitz.open("games.pdf")

# Print out the number of pages
print(doc.page_count)

# load the first page from the PDF
page = doc.load_page(0)

# extract all links from the page and store it under - links
links = page.get_links()

# print the links object
#print(links)

# print the actual links stored under the key "uri"
for obj in links:
  print(obj["uri"])
Output:
5
https://www.statista.com/statistics/1292243/software-developers-average-age-when-first-coding/
https://sparkian.com/
https://www.codemonkey.com/
8. To make our code more reusable, we can refactor it by defining a function to extract all the links in a PDF and a function to print out all the links found in a PDF. This way, you can call the functions with any PDF, and you’ll get back all the links in the PDF. The code that does this is shown below:
import fitz

# Extract all the links in a PDF document
def extract_link(path_to_pdf):
  links = []
  doc = fitz.open(path_to_pdf)

  for page_num in range(doc.page_count):
    page = doc.load_page(page_num)
    page_links = page.get_links()
    links.extend(page_links)
  return links

# print out all the links returned from the PDF document
def print_all_links(links):
  for link in links:
    print(link["uri"])

# Call the function to extract all the links in a pdf
# all the return links are stored under all_links
all_links = extract_link("games.pdf")

# call the function to print all links in the PDF
print_all_links(all_links)
Output:
https://www.statista.com/statistics/1292243/software-developers-average-age-when-first-coding/
https://sparkian.com/
https://www.codemonkey.com/
https://scratch.mit.edu/
https://www.tynker.com/
https://codecombat.com/
https://lightbot.com/
https://sparkian.com
From the code above, the function extract_link() receives a PDF file, iterates through all the pages in the PDF, extracts all the links, and returns them. The result of this function is stored in a variable named all_links
The function print_all_links() takes in the result of extract_link(), iterates through the list, and prints all the actual links found in the PDF you passed into the extract_link() function.
To extract Images from a PDF, we are still going to use PyMuPDF. To extract images from a PDF file:
1. Import PyMuPDF, io, and PIL. Python Imaging Library(PIL) provides tools that make it easy to create and save images, among other functions. io provides classes for easy and efficient handling of binary data.
import fitz
from io import BytesIO
from PIL import Image
2. Open the PDF file you want to extract images from:
doc = fitz.open("games.pdf")3. Load the page you want to extract images from:
page = doc.load_page(0)4. PyMuPdf identifies images on a PDF file using a cross reference number(xref), which is usually an integer. Every image on a PDF file has a unique xref. Therefore, to extract an image from a PDF, we first have to get the xref number that identifies it. To get the xref number of the images on a page, we use the function get_images() like so:
image_xref = page.get_images()
print(image_xref)
Output:
[(7, 0, 699, 407, 8, 'DeviceRGB', '', 'X7', 'FlateDecode')]
get_images() returns a list of tuples with information about the image. Since we only have one image on the first page, there is only one tuple. The first element in the tuple represents the xref of the image on the page. Therefore, the xref of the image on the first page is 7.
5. To extract the xref value for the image from the list of tuples, we use the code below:
# get xref value of the image
xref_value = image_xref[0][0]
print(xref_value)
Output:
[(7, 0, 699, 407, 8, 'DeviceRGB', '', 'X7', 'FlateDecode')]
7
6. Since you now have the xref that identifies an image on the PDF, you can extract the image using the extract_image() function like so:
img_dictionary = doc.extract_image(xref_value)This function, however, does not return the actual image. Instead, it returns a dictionary containing the binary image data of the image and metadata about the image, among other things.
7. From the dictionary returned by the extract_image() function, check the file extension of the extracted image. The file extension is stored under the key “ext“:
# get file extenstion
img_extension = img_dictionary["ext"]
print(img_extension)
Output:
png
8. Extract the image binaries from the dictionary stored in img_dictionary. The image binaries are stored under the key “image“
# get the actual image binary data
img_binary = img_dictionary["image"]
9. Create a BytesIO object and initialize it with the binary image data that represents the image. This creates a file-like object that can be processed by Python libraries such as PIL so that you can save the image.
# create a BytesIO object to work with the image bytes
image_io = BytesIO(img_binary)
10. Open and parse the image data stored in the BytesIO object named image_io using the PIL library. This is important as it allows the PIL library to determine the image format of the image you’re trying to work with, in this case, a PNG. After detecting the image format, PIL creates an image object that can be manipulated with PIL functions and methods, such as the save() method, to save the image to local storage.
# open the image using Pillow
image = Image.open(image_io)
11. Specify the path where you want to save the image.
output_path = "image_1.png"Since the path above contains only the name of the file with its extension, the extracted image will be saved in the same directory as the Python file containing this program. The image will be saved as image_1.png. The PNG extension is important for it to match the original extension of the image.
12. Save the image and close the ByteIO object.
# save the image
image.save(output_path)

# Close the BytesIO object
image_io.close()
The entire code to extract an image from a PDF file is shown below:
import fitz
from io import BytesIO
from PIL import Image

doc = fitz.open("games.pdf")
page = doc.load_page(0)

# get a cross reference(xref) to the image
image_xref = page.get_images()

# get the actual xref value of the image
xref_value = image_xref[0][0]

# extract the image
img_dictionary = doc.extract_image(xref_value)

# get file extenstion
img_extension = img_dictionary["ext"]

# get the actual image binary data
img_binary = img_dictionary["image"]

# create a BytesIO object to work with the image bytes
image_io = BytesIO(img_binary)

# open the image using PIL library
image = Image.open(image_io)

#specify the path where you want to save the image
output_path = "image_1.png"

# save the image
image.save(output_path)

# Close the BytesIO object
image_io.close()
Run the code and go to the folder containing your Python file; you should see the extracted image named image_1.png, as shown below:

Conclusion
To get more practice with extracting links, images, and texts from PDFs, try refactoring the code in the examples to make them more reusable, as shown in the links example. This way, you’ll only need to pass in a PDF file, and your Python program will extract all the links, images, or text in the entire PDF. Happy Coding!
You may also explore some best PDF APIs for every business need.